Wie werden Discokugeln hergestellt?
April 10, 2025

Disco balls have long been associated with fun, lively gatherings, lending an air of nostalgia and excitement to any atmosphere. Whether it’s a party, wedding, or even just a cozy night in, a sparkling disco ball brings an element of whimsy and glamour. In this article, we will explore the fascinating journey of creating your own disco ball—yes, you can create one at home!—with an easy step-by-step guide. Readers will discover essential materials, instructions, and tips to craft both classic and creative variations of this iconic decor item. Let’s dive into the entertaining world of DIY disco balls!
Claim: DIY projects like creating a disco ball contribute to unique home decor and personal expression.
Query: How to make a disco ball at home?
The charm of a DIY Discokugel lies not only in its eye-catching appeal but also in the satisfaction of creating something unique. Many party enthusiasts and home decorators opt for a DIY approach to express individuality and personal style, rather than purchasing a generic option. Constructing your own Discokugel can be a rewarding activity that gives homeowners the space they desire while showcasing creativity.
Making a Discokugel at home allows for full control over its aesthetics—colors, sizes, designs, and materials can all be tailored to match your specific requirements. With a few simple materials, as outlined in this article, you can produce high-quality decor that is both functional and artistic. Choosing to DIY can reflect personal tastes and even serve as a fun bonding activity during parties or sleepovers.
Moreover, the finished product brings more than just visual appeal; it acts as a conversation starter, welcoming memories of dancing under twinkling lights. The effort put into the creation of a personalized Discokugel underlines its value, creating a sense of accomplishment. Thus, making your own Discokugel is more than just an arts and crafts project; it connects you to festivity and joy.

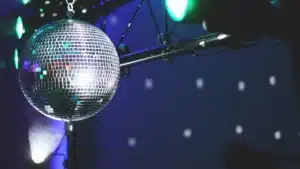
Caption: A beautifully adorned Discokugel casting stars on the ceiling during an event.
Claim: Proper materials enhance your DIY Discokugel experience and outcome.
Query: What are the materials needed to create a DIY disco ball?
Before you embark on crafting a disco ball, gathering the right materials is essential. You’ll need a foam ball or an old globe, sturdy mirror tiles, a low-temperature glue gun, and low-temperature glue sticks. For precision, having scissors or wire cutters is also necessary, along with optional items like E6000 glue and a screw hook for hanging purposes.
The foam ball serves as a lightweight base if you prefer a simple project. Alternatively, using an old globe can add a vintage touch while allowing for a bit of character. Mirror tiles are crucial as they reflect light dynamism, creating the much-loved disco ball effect. Choosing tiles that are easy to work with will streamline the crafting process and yield a more polished end-product.
It’s imperative to have a low-temperature glue gun, which ensures a secure bond without melting any components involved. The inclusion of the optional E6000 adhesive provides additional durability, especially if hanging the disco ball from a ceiling or any structure. Preparing the right materials beforehand allows for a smooth and enjoyable crafting experience, enhancing your results.

Caption: An individual joyfully holding a disco ball, highlighting the playful nature of the decor.
Claim: Following precise steps ensures excellent results in DIY projects, maximizing creativity.
Query: How do you create a classic Discokugel step by step?
Now that you have your materials at hand, it’s time to dive into the crafting process! The first step is to prepare your base; if you’re using a globe, consider spray-painting it silver to create a seamless look when attaching the mirror tiles. If you’re opting for a foam ball, you can skip this step and move directly to gluing on the mirror tiles.
Next, you may want to add a hanging hook to your disco ball. Why? This allows you to suspend the ball, producing a splendid twinkling effect! If using a foam ball, simply insert a screw hook into the top. For added security, utilize E6000 glue to fasten the hook firmly.
Once you have your base prepared and your hook in place, proceed to glue the mirror tiles. Apply a small dot of glue onto the back of each tile and start at the top. Cover the surface in rows while allowing for tiny gaps between tiles; these gaps will become less noticeable as the entire ball gets covered. Snip smaller tiles with scissors or wire cutters to fill any gaps, ensuring a smooth and cohesive look.

Caption: A disco ball adorned with tropical foliage, showcasing versatility in design.
Claim: Experimenting with designs adds flair and originality to DIY projects.
Query: What are creative variations of a DIY disco ball?
While classic disco balls are stunning, consider exploring creative variations to add an innovative twist. One such variation is creating a melting disco ball, which can become a striking centerpiece in any setting. To create this unique design, start by using a Styrofoam ball paired with air-dry clay. You’ll first need to create a framework using skewers and smaller Styrofoam balls to simulate the melting effect.
Once you have the framework structure in place, use air-dry clay to encompass the framework. Smooth the clay using water to enhance the glossy appearance, giving your melting disco ball a chic finish. Crafting such imaginative designs not only shows your creative flair but also enriches the storytelling element of your decor.
After the clay is completely dry, secure a hoop and chain at the top of your melting disco ball for hanging purposes. The incorporation of this style will lead to the creation of a memorable piece that could be the highlight of any event, demonstrating your artistic capabilities.
Claim: Proper placement of decor items enhances visual appeal and ambiance.
Query: How do I decide where to display my DIY disco ball?
If you’re not aiming for a hanging option, consider placing the disco ball on a table or a lighted platform where it can radiate shimmer and shine in your direction. Positioning it near a natural light source enhances its reflective properties, as the sunlight catches the various angles of the mirror tiles on its surface throughout the day.
Ultimately, the goal is to ensure that your disco ball becomes a focal point in the decor. Thoughtful placement allows it to catch the eye and engage guests, transforming ordinary events into spectacular gatherings. Be creative with your display approach and let your disco ball become a conversation starter.
In conclusion, the process of creating your own disco ball offers not only a fun activity but also a unique addition to any decor theme. With easy access to materials and step-by-step instructions, anyone can embark on this project and successfully make a creation that embodies their style and personality. From the classic pieces glimmering under lights to melting interpretations that draw attention, the sky is the limit. DIY disco balls can elevate any event or space, inviting laughter and memorable moments!
Don’t hesitate—let your creativity shine and start crafting your very own disco ball today!
Share the article with your friends.