Wie werden Discokugeln hergestellt?
April 10, 2025

Creating a disco ball might seem like a task reserved for professional event planners or party enthusiasts, but it is actually a fun and accessible DIY project that anyone can undertake. A disco ball adds a sparkly and festive ambiance to any gathering, enhancing the aesthetic appeal of your home decor. In this article, we will provide a comprehensive guide on how to make your own disco ball, covering essential materials, steps for production, and tips for showcasing your newly crafted piece. Whether you want to impress your friends at the next gathering or simply want a colorful addition to your space, making a disco ball is a rewarding and creative venture.
Why is having the right materials crucial for your Discokugel project?
The importance of selecting appropriate materials cannot be overstated in any craft or DIY project. Using the correct materials will ensure that your Discokugel not only looks great but is also durable and safe for display. The process starts with the foam ball as the core, which is easy to manipulate and can be found in various sizes. The mirror tiles are essential, as they reflect light and create the classic disco effect. Other materials include a screw hook for hanging the disco ball, a low-temperature glue gun, and E6000 adhesive as an optional additional securing agent.
Once you have gathered all required items, you are ready to begin crafting your Discokugel. The initial selection of materials directly influences the quality of your final product. High-quality mirror tiles will shimmer better and withstand wear and tear. Additionally, you should make sure that your foam ball is intact and free of blemishes that may affect the overall look of your disco ball.

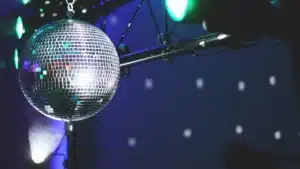
Caption: Diskokugel Ceiling
How can you transform mundane materials into a captivating Discokugel?
There are multiple steps involved in creating a Discokugel that range from simple to more intricate tasks. The first step is to prepare the foam ball, where inserting the screw hook at the top will allow for easy hanging later on. This step is crucial, especially if you envision your disco ball suspended from the ceiling for the ultimate party effect. Don’t forget to use a drop of E6000 adhesive for an added layer of security!
Next, it’s time to attach the mirror tiles to the foam ball. Start from the top, applying a small dot of low-temperature glue onto the back of each tile before placing them in an X pattern around the ball. This pattern not only guides your placement of the tiles but also helps achieve a balanced and visually appealing layout. As you continue, ensure to cover gaps by cutting additional tiles, creating an even and continuous sparkling surface.
The final phase of your disco ball project is to display it proudly. Allow the glue to fully dry before hanging or placing it on a shelf. Consider enhancing its display by positioning a spotlight nearby to maximize the twinkling effect created by the reflected light. Your DIY disco ball is now complete and ready to elevate the ambiance of any event!

Caption: Embracing a Disco Ball
Why is showcasing your disco ball important for creating the right atmosphere?
Showcasing your disco ball is crucial to maximize its visual impact and add a sense of charm and whimsy to your living space. The right display can turn an already beautiful piece into the centerpiece of a room or a conversation starter at any gathering. Consider the lighting in your space; strategically placing your Discokugel in a location where it can catch and reflect light will enhance its features significantly.
Proper placement involves considering both height and angle. If hanging the disco ball, choose a location that allows it to spin freely, enhancing the light refractions that dance around your room. Ground displays should be elevated on pedestals or shelves to create more elevation and visibility. Additionally, combining your disco ball with other decor elements, like plants or fairy lights, can create an engaging visual experience for your guests.
It’s exciting to see how a simple DIY project can become a stunning visual element in your home. The disco ball can transform any dull corner into an invigorating space, ideal for entertainment and relaxation. Make sure to continually rotate the display location if you wish to change up the ambiance in different rooms or during different occasions.

Caption: Disco Ball in a Natural Setting
How does creating your own disco ball elevate your DIY experience?
Making your own disco ball offers numerous benefits, not just in terms of aesthetics but also regarding creativity and personalization. The ability to design your disco ball allows for immense creative freedom. You can choose the size, arrangement of mirrors, and even customize the colors to match your personal taste or the theme of any event. This customizable aspect greatly enhances your experience and satisfaction with the final product.
Another significant benefit comes from the cost savings involved. Purchasing a disco ball can be expensive; however, creating one at home provides a budget-friendly alternative. This DIY project allows you to have a unique decor item without breaking the bank. Moreover, crafting engages you in a hands-on activity that promotes mental wellness and can be a stress-reliever.
Ultimately, taking the time to create something unique and personal, like a disco ball, fosters a sense of accomplishment and pride. It is vital to show it off not only as a decoration but as a testament to your creativity and resourcefulness.
In conclusion, creating a disco ball is an enjoyable and straightforward DIY project that can enhance your home’s aesthetic space while providing a sense of achievement. With relatively inexpensive materials and easy-to-follow steps, you can create a unique decorative piece that reflects your personality. Whether hosting a party or simply enhancing your home’s ambiance, your handcrafted disco ball will surely impress guests and add sparkle to any occasion. Embrace your creativity, gather your materials, and get started on making your own disco ball today!
Share the article with your friends.