

Introduction
Plain terra cotta pots are so last season—today’s home decorators crave showstopping pieces that blend greenery with personality. That’s where the disco ball planter shines (literally), transforming dull corners into glittering conversation starters.
As disco ball crafters for over 20 years, we’ve seen how these reflective planters steal the spotlight at weddings, garden parties, and even everyday spaces. The best part? You don’t need fancy skills—just adhesive mirrors, a waterproof sealant, and plants that won’t upstage the sparkle.
Ready to turn your planters into mini dance floors? Let’s break down how to create these retro-glam gems for any space.
Why Disco Ball Planters Are the Ultimate Decor Upgrade
Disco ball planters blend retro charm with modern functionality, making them a standout choice for both indoor and outdoor spaces.
Disco ball planters are taking the decor world by storm, offering a perfect mix of nostalgia and contemporary style. These shiny, reflective planters aren’t just for holding plants—they’re statement pieces that can transform any room or garden. Whether you’re into ride-or-die retro vibes or just want something unique, disco ball planters deliver.
The Retro-Glam Revival: Why Disco Ball Decor Is Trending
The 70s are back, and disco ball decor is leading the charge. Disco ball planters tap into this trend, bringing a touch of vintage glam to modern homes. Their mirrored surfaces catch light beautifully, creating a dynamic effect that changes with the time of day. Plus, they pair well with everything from bohemian to minimalist styles.
Indoor vs. Outdoor Use: Where to Showcase Your Planter
Disco ball planters work indoors as eye-catching centerpieces or outdoors as garden accents. Indoors, they brighten up shelves, tabletops, or hanging displays. Outdoors, they reflect sunlight, adding sparkle to patios or garden beds. Just ensure outdoor versions are weather-resistant to maintain their shine.
Light Reflection Magic: How Disco Ball Planters Enhance Spaces
The reflective surface of a disco ball planter bounces light around, making small spaces feel larger and dark corners brighter. Place one near a window or under a light fixture to maximize the effect. It’s an easy way to add depth and energy to any room.
Commercial Insight: Customization Options for Events (Weddings/Parties)
For those planning events, disco ball planters offer endless customization. Companies like BuyDiscoBall.com provide personalized options, from sizes to finishes, perfect for weddings, parties, or corporate events. These planters double as chic decor and memorable favors.
DIY Disco Ball Planter Guide
| Material | Cost | Difficulty | Time Required | Best For |
|---|---|---|---|---|
| Pre-made disco ball + planter insert | $20-$50 | Easy | 10 mins | Quick upgrades |
| Mirror tiles + foam sphere | $15-$30 | Moderate | 1-2 hours | Custom sizes |
| Recycled CDs + glue | $5-$10 | Challenging | 3+ hours | Eco-friendly projects |
| 3D-printed base + metallic spray | $25-$60 | Advanced | 4+ hours | Tech enthusiasts |
| Glass mosaic + adhesive | $30-$70 | Expert | 5+ hours | Artistic flair |
Ready to craft your own? Start with a simple pre-made base or go all-out with a mosaic design. Either way, your space will glow with personality. For pro-quality options, check out wholesale suppliers like BDB Discoball, where durability meets dazzle.
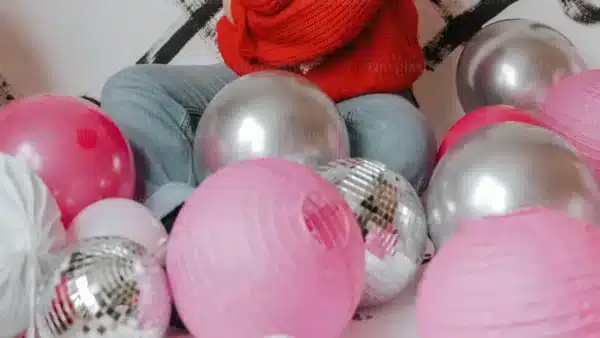
[Featured Image]: A DIY disco ball planter reflecting sunlight in a bohemian-style living room – [ALT: Handmade disco ball planter with succulents]
Materials & Tools: What You Need to Get Started
Creating your own DIY disco planters requires just a few key materials, whether you want a quick project or a custom masterpiece.
Ready to craft some mirror ball planters? Here’s everything you’ll need to bring that disco sparkle to your plants. DIY disco planters can range from simple upcycled projects to professional-grade creations, depending on your vision and budget.
Adhesive Mirrors vs. Mosaic Tiles: Pros and Cons
Adhesive mirror sheets are the easiest option for beginners – just peel and stick onto any spherical base. Mosaic tiles offer more durability and artistic freedom but require grout and extra time. Mirror sheets cost $10-$20 per sheet, while tile kits run $15-$40 depending on material.
Weather-Resistant Options for Outdoor Durability
For outdoor use, choose stainless steel mirror tiles or acrylic mirrors that won’t tarnish. Seal grout with waterproof sealant if using mosaic tiles. Outdoor-grade adhesives (like marine epoxy) will keep everything secure through rain and shine.
Budget-Friendly Alternatives (Upcycled Disco Balls)
Check thrift stores for old disco balls you can repurpose. Broken CDs make excellent reflective pieces when cut into shapes. Even aluminum foil can create a fun temporary version for kids’ projects.
Where to Buy Materials (Local Stores + Online Retailers)
Craft stores like Michaels carry mirror sheets and mosaic supplies. For bulk orders, BuyDiscoBall.com offers wholesale pricing perfect for event planners needing multiple units. Their pre-made disco ball bases save time for large projects.
DIY Disco Planter Material Comparison
| Material | Cost | Durability | Difficulty | Best For |
|---|---|---|---|---|
| Adhesive Mirror Sheets | $10-$20 | Moderate | Easy | Quick indoor projects |
| Glass Mosaic Tiles | $15-$40 | High | Intermediate | Permanent outdoor use |
| Upcycled CDs | Free-$5 | Low | Moderate | Eco-friendly crafts |
| Pre-made Disco Ball Base | $25-$60 | High | Easy | Event planners |
| Aluminum Foil | $2-$5 | Very Low | Very Easy | Kids’ projects |
For those wondering how to create disco ball planters that last, invest in quality adhesives and sealants. Event planners can save significantly with bulk purchases from wholesale suppliers like BDB Discoball, where professional-grade materials meet creative planter ideas.
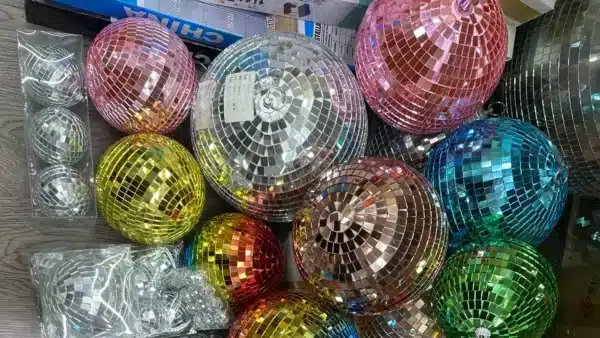
[Featured Image]: Various materials for making disco ball planters laid out on a craft table – [ALT: Mirror tiles, adhesive sheets and tools for DIY disco planter project]
Step-by-Step DIY Guide: Crafting Your Disco Ball Planter
Transform any planter into a dazzling disco ball with this easy-to-follow guide that covers everything from prep to waterproofing.
Creating your own disco ball planter is easier than you think! Follow these steps to make a showstopping piece that’ll add sparkle to any space. Whether you’re making disco ball plant pots for your home or an event, this guide has you covered.
Prepping Your Base Planter: Cleaning & Priming
Start with a clean, dry spherical planter. Wipe it down with rubbing alcohol to remove oils and dirt. For better adhesion, lightly sand plastic surfaces and apply a primer designed for your material type.
Mirror/Tile Application Techniques (Grid vs. Random Patterns)
For a classic look, arrange mirror tiles in neat rows. Want something more organic? Try a random mosaic pattern. Apply adhesive to small sections at a time, pressing each piece firmly for 10-15 seconds. Work from the bottom up to prevent sliding.
Waterproofing: How to Seal for Longevity
Once all pieces are set (wait 24 hours), apply a clear waterproof sealant between tiles. For outdoor use, choose a UV-resistant sealant and reapply annually. This protects both the adhesive and the reflective surfaces.
Quick Fixes for Common Mistakes (Misaligned Mirrors, Adhesive Issues)
If a tile is crooked, gently heat the adhesive with a hair dryer to reposition. For excess glue, wipe immediately with a damp cloth. Missing spots? Small mirror fragments can fill gaps beautifully.
Disco Ball Planter Creation Timeline
| Step | Time Needed | Materials Required | Pro Tip | Common Challenges |
|---|---|---|---|---|
| Preparation | 15-30 mins | Rubbing alcohol, sandpaper | Mark guide lines with chalk | Skipping prep leads to poor adhesion |
| Tile Application | 1-3 hours | Mirror tiles, adhesive | Work in small sections | Adhesive drying too fast |
| Drying Time | 24 hours | None | Use clips to hold tricky pieces | Impatience! |
| Sealing | 30 mins + dry time | Waterproof sealant | Apply in thin layers | Over-application causing cloudiness |
| Planting | 15 mins | Plants, potting mix | Use lightweight plants | Overwatering without drainage |
For more disco ball planter decor tips and professional-grade supplies, check out BuyDiscoBall.com’s tutorial section. Their expert guides can help take your DIY disco planters to the next level.
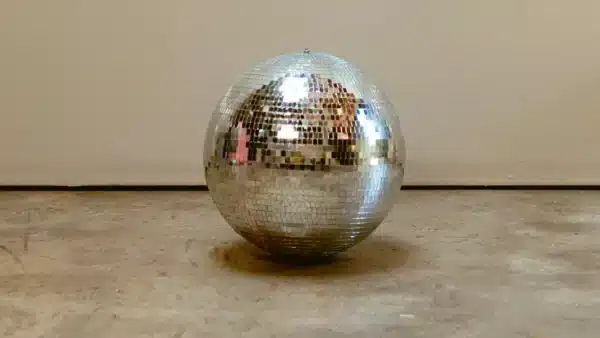
[Featured Image]: Hands applying mirror tiles to a spherical planter base – [ALT: Close-up of DIY disco ball planter in progress]
Plant Pairings & Styling Ideas for Maximum Impact
Discover how to pair plants with your disco ball planter to create stunning displays that shine day and night.
Your disco ball planter deserves plants that enhance its sparkle. These unique garden planters work best with plants that complement rather than compete with their reflective surfaces. Let’s explore some perfect pairings and styling tips to maximize your retro home decor.
Best Plants for Disco Ball Planters (Succulents, Air Plants, Ivy)
Succulents are ideal – their geometric shapes mirror the planter’s facets. Try echeveria or sedum varieties. Air plants (tillandsia) create a floating effect, while trailing ivy adds graceful movement. All three are low-maintenance, perfect for busy plant parents.
Grouping Planters: Creating Visual Interest
Cluster planters in odd numbers (3 or 5) at varying heights. Mix disco balls with matte planters for contrast. Hang some at eye level while placing others on surfaces to create depth. This arrangement catches light from multiple angles.
Themed Decor Ideas (Weddings, Holidays, Boho Chic)
For weddings, pair with white blooms and fairy lights. During holidays, add miniature ornaments. Boho styles shine with macrame hangers and mixed textures. BuyDiscoBall.com’s LED accessories can transform your planters into evening showstoppers for events.
Maintenance Tips to Keep Your Planter Sparkling
Wipe mirrors monthly with vinegar solution. Rotate plants weekly for even growth. Avoid overwatering – use a spray bottle for air plants. Touch up any missing tiles promptly to maintain that dazzling effect.
Disco Ball Planter Plant Guide
| Plant Type | Light Needs | Water Frequency | Style Pairing | Special Care |
|---|---|---|---|---|
| Succulents | Bright indirect | Every 2-3 weeks | Modern | Drainage essential |
| Air Plants | Medium light | Mist 2x weekly | Minimalist | Good air circulation |
| English Ivy | Low to medium | Weekly | Classic | Prune regularly |
| String of Pearls | Bright light | Every 10 days | Boho | Rotate for even growth |
| Spider Plant | Indirect light | When dry | Retro | Remove brown tips |
For the best plants for disco ball planters, choose varieties that thrive in your specific lighting conditions. Remember – the plant should enhance, not overwhelm, your planter’s dazzling design.

[Featured Image]: A collection of disco ball planters with different plants arranged on a patio table – [ALT: Variety of planted disco ball planters in sunlight]
Pro Tips & Creative Variations
Take your disco ball planter to the next level with these expert techniques and imaginative twists that will make your creation truly unique.
Ready to elevate your mirror ball planters game? These creative planter ideas will transform your basic design into something extraordinary. Whether you’re wondering ‘can disco ball planters be used outdoors’ or looking for showstopping variations, we’ve got you covered.
Painting Mirrors for Metallic Effects
For a custom look, carefully spray paint mirror tiles before applying them. Gold creates warmth, while silver amps up the retro vibe. Use light coats and let dry completely between layers to maintain reflectivity.
Hanging vs. Tabletop Displays
Hanging disco ball planters create magical light patterns on walls and ceilings. For tabletop versions, consider a weighted base. BuyDiscoBall.com’s limited-edition mini disco balls make perfect hanging versions with their built-in hooks.
Using Disco Ball Planters as Party Favors
Mini versions (4-6 inches) planted with herbs or succulents make unforgettable favors. Include care instructions and tie with ribbon matching your event colors. Guests will love these sparkling takeaways.
Q&A: Answering Reader Questions
Outdoor Durability: Yes, with weatherproof materials and sealant. Plant Compatibility: Stick to drought-tolerant varieties for outdoor use. Rotate indoor planters weekly for even light exposure.
Disco Ball Planter Variations Guide
| Variation | Materials Needed | Difficulty | Best For | Pro Tip |
|---|---|---|---|---|
| Ombre Effect | Gradient mirror tiles | Advanced | Statement pieces | Plan layout before gluing |
| Geometric | Cut mirror pieces | Intermediate | Modern spaces | Use stencils for precision |
| Mixed Media | Mirror + other materials | Creative | Eclectic decor | Maintain balance |
| Mini Favors | 3-4″ disco balls | Easy | Events | Pre-make bases |
| Illuminated | LED lights | Moderate | Evening displays | Use battery-operated |
For exclusive designs that take the work out of DIY, check out BuyDiscoBall.com’s seasonal collections. Their weather-resistant options are perfect for answering that common question about outdoor use.
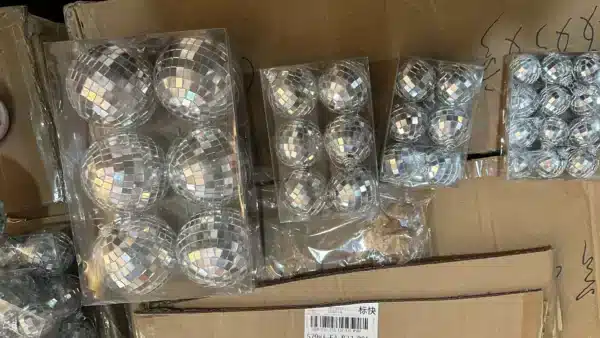
[Featured Image]: A collection of creatively customized disco ball planters displayed together – [ALT: Variety of decorated disco ball planters showing different styles]
Conclusion
After years of crafting disco balls and seeing how they light up spaces, I can confidently say disco ball planters are more than just decor—they’re mood boosters. Whether you DIY with thrifted mirrors or opt for a pro-grade piece, the result is always a showstopper that turns heads and sparks joy.
What sticks with me isn’t just the glitter—it’s how these planters blend nostalgia with modern flair. They prove even small touches can transform a room from meh to magical. And honestly? That’s the kind of upgrade worth making.
So go ahead—let your space shine a little brighter. After all, life’s too short for boring planters.
FAQ
-
Q1: What is a disco ball planter?
A1: A disco ball planter is a decorative planter styled like a disco ball, often featuring reflective mirror surfaces that catch light and enhance the aesthetic appeal of plants, making them ideal for indoor spaces looking to add a touch of retro charm.
-
Q2: How do you make a DIY disco ball planter?
A2: To make a DIY disco ball planter, you need a disco ball, remove half of it, attach a chain for hanging, and securely fix a plant pot inside. This can be embellished further with Mod Podge and glitter for added sparkle.
-
Q3: Where can disco ball planters be used?
A3: Disco ball planters can be used indoors in living rooms, near windows to catch sunlight, or outdoors on patios to create a fun, reflective decorative element.
-
Q4: What plants are best suited for disco ball planters?
A4: Plants like succulents, air plants, and trailing plants such as spider plants are ideal for disco ball planters due to their size and minimal soil and water requirements.
-
Q5: Can disco ball planters be used outdoors?
A5: Yes, many disco ball planters are designed for both indoor and outdoor use, often coming with durable materials and chains that withstand weather conditions.
-
Q6: What size options are available for disco ball planters?
A6: Disco ball planters are available in various sizes, typically ranging from 4 inches to 12 inches, suitable for different plants and decorative needs.
-
Q7: Are disco ball planters only for retro-themed decor?
A7: While disco ball planters are reminiscent of retro styles, they can complement various decor styles by adding a unique, reflective accent anywhere in modern, minimalist, or eclectic settings.
-
Q8: What are some tips for incorporating disco ball planters in home decor?
A8: Disco ball planters can be paired with colorful pots or used in groups for a dramatic effect. They add brightness when placed near windows or amidst themed decorations to make them stand out.
External Links
- If You Spot This Disco Ball Planter at HomeGoods, Grab 2 | The Kitchn
- Make Your Own Disco Ball Hanging Planter – A Beautiful Mess
- How to Make a Disco Ball Planter: A DIY Project for the Home
- NPW Disco Planter Gifting – Target
- SCANDINORDICA Disco Ball Planter – Amazon.com
- Disco Ball Planter – Walmart.com
- Disco Ball Hanging Planter | Michaels
- Disco Ball Hanging Planter – Plant Addicts