

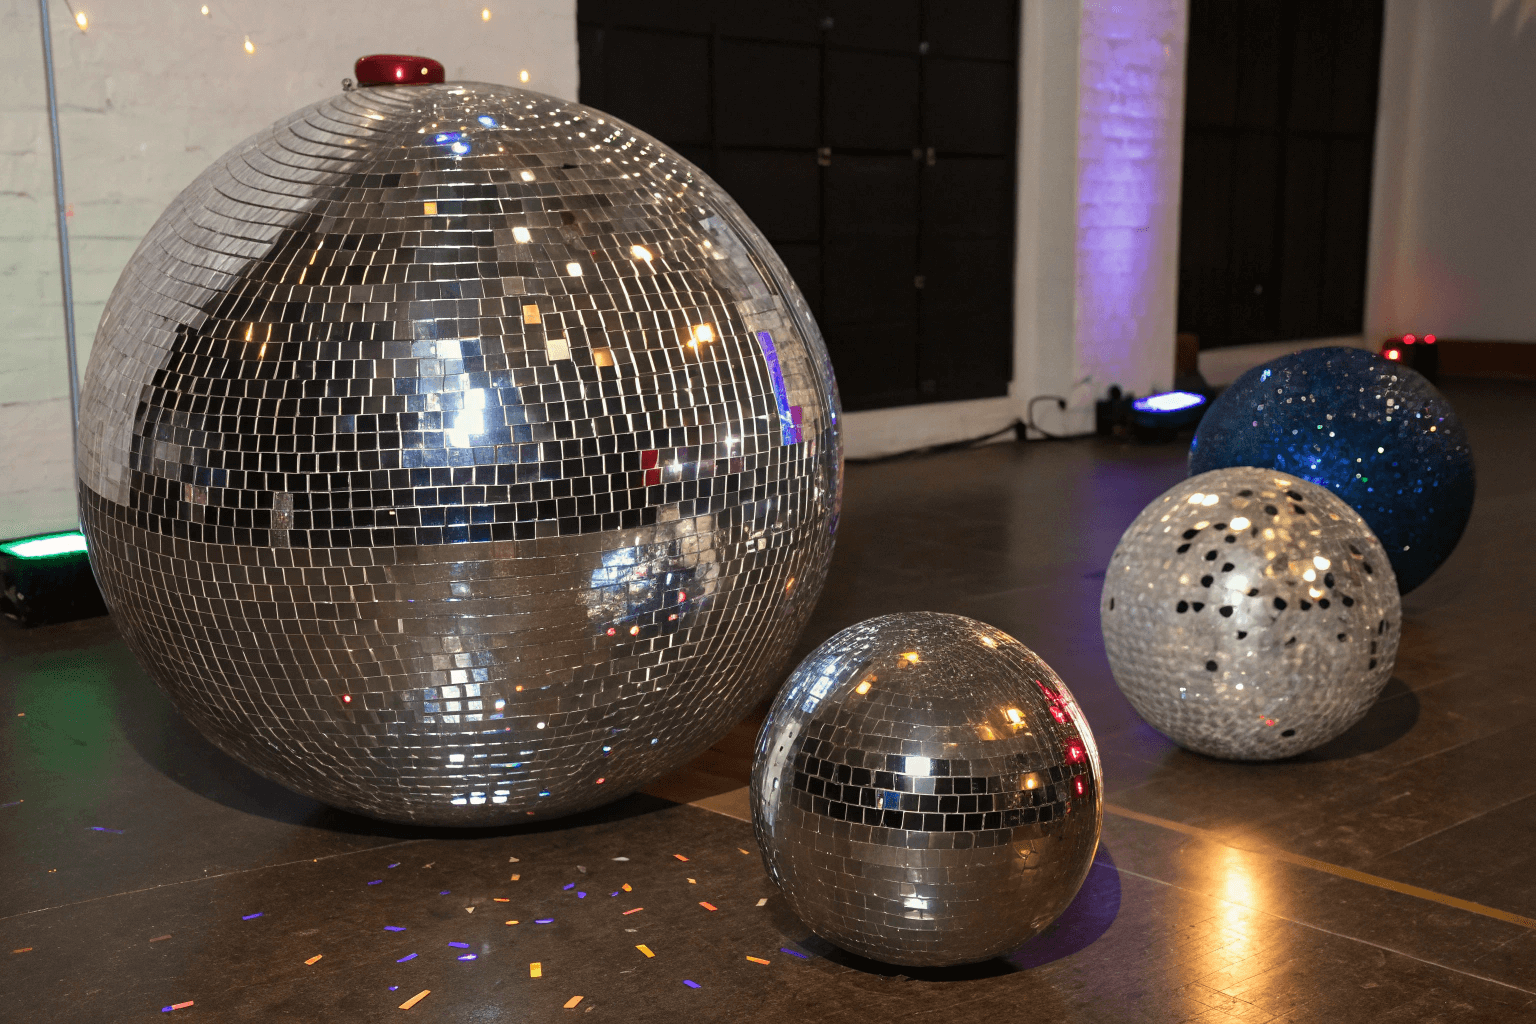
For rental houses and event managers, a dull or damaged mirror ball isn’t just a visual flaw—it’s a measurable loss in asset performance and client satisfaction. Dust alone can reduce a mirror’s reflectance by several percent, directly impacting the sharp, brilliant sparkle your productions rely on.
This guide provides the technical protocols used by professionals to maintain, repair, and preserve these assets. You’ll learn the science behind safe cleaning with lint-free microfiber and mild solvents, the precise method for patching missing 1″ x 1″ tiles to maintain balance, and how to assess when a full strip and resurface is necessary to protect your investment.

Why Dust is the Enemy of Reflection
Dust is the enemy of reflection because it scatters and absorbs light, reducing the specular brightness and sparkle of a mirror. Even a thin layer of particles can lower reflectance by several percent, dulling the visual effect. For rental assets and high-end installations, this translates to a loss of performance and increased maintenance costs.

How Dust Steals Light and Dulls Your Mirror
Clean, high-performance mirrors for lighting and optics are engineered for reflectance values of 95–99% or higher. This specular brightness is what creates a sharp, brilliant reflection.
Dust deposits create a layer of rough, heterogeneous particles that scatter incoming light, increasing haze and diffuse reflection. This scattering reduces the number of photons that return as a coherent, bright specular beam, making reflections appear dull and patchy.
The impact is measurable. In concentrating solar power systems, field studies classify ‘dusty mirror’ states with measurable reflectivity losses directly tied to dust density. For a mirror ball, this physics means visibly lower sparkle, non-uniform highlights, and a loss of the intended dramatic visual effect.
Engineering and Durability: Why Protection is Built-In
High-end mirrors are specifically designed to withstand dust and cleaning, underscoring dust as a primary design challenge. Major observatory mirrors, like the 8.4 m Rubin Observatory mirror, use protective silicon nitride (Si₃N₄) overcoats explicitly to guard the reflective silver layer from dust and contaminants.
Commercial hard-coated dielectric mirrors on UV-fused silica substrates are specified for durability and ‘easy handling and cleaning’ because repeated dust removal is a known operational requirement. This design philosophy treats dust as a key failure mode.
This is validated in standardized testing. Automotive component testing standards involve blasting parts with cement dust at 30 mph for 24 hours to validate seal integrity and optical function under extreme dust loading. For a B2B partner managing rental mirror balls, this underscores that choosing dust-tolerant coatings and disciplined cleaning is central to preserving asset brightness and service life.
Pro Cleaning Protocol: Microfiber & Mild Solvents
This protocol uses lint-free microfiber cloths and specific mild solvents like naphtha or isopropyl alcohol to safely lift oils and grime from mirror ball tiles. The key is to blot, not rub, after testing in an inconspicuous area to prevent damage to finishes and coatings.

| Material / Code | Key Specification | Application Note |
|---|---|---|
| Microfiber Cloths | Clean, soft, lint-free | Prevents scratches and residue transfer on glass and polished finishes. |
| Mild Solvents (e.g., Naphtha, Isopropyl Alcohol) | Apply lightly with moistened cloth | Blot, do not rub. Always test in an inconspicuous area first. |
| Hydrogen Peroxide | 3% or lower concentration | For oxidizing actions on fibers; limits chemical aggression. |
| Cleaning Codes (WS, S, S-W) | Defines allowable cleaning methods | Validates solvent use on specific materials like upholstery and microfiber. |
| IICRC S300 Standard | Professional Upholstery Cleaning | Governs soil suspension via chemical action, heat, agitation, time, and neutralization. |
The Science of Safe Surface Cleaning
Microfiber cloths are essential for their lint-free, non-abrasive properties, preventing scratches and residue transfer on glass and polished finishes. Their structure allows them to lift and trap soil without damaging delicate surfaces.
Mild solvents like naphtha, mineral spirits, or isopropyl alcohol work by emulsifying oils and grease without degrading underlying fibers or coatings common in mirror ball construction. They break down the bond between the soil and the surface, allowing for safe removal.
The protocol is grounded in controlled chemical action, using low concentrations (e.g., 3% hydrogen peroxide) for soil suspension, followed by neutralization to protect synthetic materials. This approach manages the chemical reaction to clean effectively while preserving the integrity of finishes and fibers like polyester, olefin, or acetate.
Step-by-Step Application & Industry Standards
Always pre-test solvents on an inconspicuous area. Apply the solvent lightly with a moistened cloth, then blot—do not rub—to avoid spreading stains or damaging the surface. Immediate wiping is crucial on wood or polished surfaces to prevent solvent degradation.
Adhere to fabric cleaning codes: ‘S’ for solvent-only, ‘W-S’ for water or solvent-based cleaning, which validate this method for professional upholstery and similar materials. These codes, found on tags, are a direct guide for safe cleaning practices on specific fabrics.
Follow IICRC S300 standards for professional upholstery cleaning, which emphasize soil suspension via chemical action, heat, agitation, and time, with proper post-cleaning neutralization. This standard ensures a complete cleaning cycle that removes soil and resets the fiber’s pH to prevent residue and protect materials like protein or synthetic fibers.
How to Patch Missing Tiles like a Pro
Professional patching requires matching the original 1″ x 1″ tile module, using a foam-safe mirror adhesive applied in small dabs, and meticulously cleaning the substrate. This preserves the ball’s spherical profile and balance, ensuring seamless light reflection and preventing future tile loss under rotational stress.

| Core Principle | Technical Requirement | Pro-Grade Rationale |
|---|---|---|
| Tile Matching | Use 1″ x 1″ glass mirror tiles | Maintains the visual grid and light beam pattern; prevents balance and visual irregularities on balls 20″ and larger. |
| Adhesive Selection | Foam-safe mirror mastic in cartridge form | Bonds glass without damaging the reflective backing; prevents melting of common polystyrene or plastic cores. |
| Surface Preparation | Degrease and de-dust the substrate | Removes fog fluid residue and dust that cause tile failure; ensures a strong, long-term chemical bond. |
| Application Technique | Apply adhesive in small beads or dots | Keeps the adhesive flush with the tile edge to maintain a spherical, snag-free surface that won’t disrupt light reflection. |
| Structural Load | Bond must handle shear, peel, and vibration | A 20″ ball weighs 8–10 lb and rotates while suspended; the repair must withstand these dynamic forces. |
The Pro-Grade Patching Philosophy
Patching is a micro-facade restoration, not just gluing. The goal is to reintroduce tiles that match the original size, thickness, and reflectivity to maintain the ball’s visual grid and light beam pattern.
Balance and spherical profile are non-negotiable. Using mismatched tiles or excess adhesive that sits ‘proud’ of the surface can disrupt rotation, snag on equipment, and create visual irregularities in the reflected light.
Adhesion must withstand dynamic loads. A 20″ mirror ball weighs 8–10 lb and rotates while suspended; the bond must handle shear, peel, and vibration from continuous use in venues.
Technical Protocol: Materials, Prep, and Application
Source 1″ x 1″ glass mirror tiles to match the standard module for balls 20″ and larger. This ensures alignment with the existing lattice and prevents visual ‘step’ lines.
Use a mirror-specific adhesive (mirror mastic) in cartridge form. It must be foam-safe or water-based to avoid melting common polystyrene or plastic cores. Apply adhesive in small beads or dots behind each tile, not a full-surface smear.
Thoroughly clean the exposed substrate with a mild solvent to remove dust, fog fluid residue, and loose paint. A degreased, de-dusted surface is critical for a long-term chemical bond.
Align new tiles precisely to the existing grid. Press firmly to seat the tile flush with its neighbors, ensuring the adhesive does not protrude. Wipe away any excess immediately to maintain a snag-free, spherical surface.
Source Professional-Grade Mirror Balls, Factory Direct.
Removing Adhesive Residue without Scratching Glass
The safe removal of adhesive from glass relies on softening the residue with heat or a chemical solvent, then lifting it with a plastic tool. Key steps include a 5-15 minute dwell time for solvents like isopropyl alcohol, using a hair dryer on medium heat for 30-60 seconds, and scraping only with a plastic scraper or credit card to avoid scratches. A final clean with a glass-specific cleaner restores the surface.

The Core Principle: Soften, Don’t Scrape
The primary goal is to lower the adhesive’s tack and cohesion, minimizing the force needed for removal. This principle ensures any subsequent physical contact is gentle, drastically reducing the risk of creating permanent scratches on the glass.
Chemical softening with solvents like isopropyl alcohol, white vinegar, or commercial removers (e.g., Lift Off®) requires a 5-15 minute dwell time to be effective. Thermal softening using a hair dryer on a medium setting for 30-60 seconds is recommended for pressure-sensitive adhesives like tape.
Tool Selection and the Final Cleaning Protocol
Only plastic scrapers or a credit card should contact the glass surface; metal blades are not recommended due to the high scratch risk. Use only soft, non-abrasive microfiber cloths for wiping and drying to prevent micro-scratches.
After removal, a solvent wipe (e.g., with isopropyl alcohol) is needed to eliminate any leftover adhesive remover or film. A final clean with mild detergent and water or a dedicated glass cleaner is essential to restore optical clarity, as per protocols like the 3M graphics removal bulletin.
Storing Large Spheres to Prevent Oxidation
Preventing oxidation in large spheres, whether industrial tanks or decorative mirror balls, relies on creating a protective barrier and controlling the environment. This involves using specific anti-corrosion materials and coatings, implementing regular inspection routines based on formal standards, and managing the storage atmosphere to limit exposure to oxygen and moisture.

Barrier Systems: Materials and Protective Coatings
Industrial spherical tanks are commonly made from A516 Grade 70 carbon steel for strength, but this material requires robust anti-corrosion coatings to prevent rust and oxidation.
For high-corrosion environments, stainless steel or composite shells made from carbon/glass fiber with epoxy resin are specified for their inherent resistance.
The maintenance of these anti-corrosion coatings is a critical routine task; any defects must be repaired promptly to prevent under-film corrosion that can compromise the sphere’s integrity.
For mirror balls, this principle translates to ensuring the reflective backing and any protective clear coats are intact, and storing the sphere in a way that prevents physical damage to these surfaces.
Environmental Control and Inspection Protocols
In industrial storage, inert gas blanketing (e.g., with nitrogen) is used to reduce oxygen in the vapor space below levels that drive corrosion and product degradation.
Formal standards like API 510, API 653, and NFPA 30 govern the design, inspection, and maintenance of these tanks, mandating regular checks for corrosion, coating damage, and leaks.
Non-destructive testing (NDT) methods, such as ultrasonic thickness measurement, are required to detect wall thinning and flaws before they become critical.
For mirror ball storage, this means keeping the sphere in a clean, dry, and stable environment—ideally in its original protective packaging—and establishing a simple visual inspection routine before and after significant events to catch early signs of tarnish or backing failure.
The Maintenance Kit Checklist for Rental Houses
A well-stocked maintenance kit for a rental house includes tools for basic repairs, cleaning supplies, and safety equipment. Key items are a multi-bit screwdriver, adjustable wrench, plunger, voltage tester, HVAC filters, and fire safety supplies like spare smoke detector batteries. Having these items readily available allows for quick response to minor issues, helping to preserve the property and ensure tenant safety.

Essential Tools and Supplies for Every Kit
A multi-bit screwdriver set and an adjustable wrench are fundamental for tightening loose fixtures, assembling furniture, and performing a variety of small repairs.
A quality plunger, a drain snake, and Teflon tape will help you address the most common plumbing issues, such as clogged toilets and sinks or minor pipe leaks.
For basic electrical safety, a non-contact voltage tester is essential for verifying circuits are dead before work. Wire strippers and a supply of spare light bulbs allow for quick replacements.
Keep a set of HVAC filters with a MERV 8-11 rating on hand. These should be changed quarterly to maintain system efficiency and indoor air quality.
Fire safety supplies are non-negotiable. This includes spare 9V batteries for smoke and carbon monoxide detectors, which should be tested monthly and replaced bi-annually, and a readily accessible fire extinguisher.
Proactive Items for Seasonal and Annual Tasks
For seasonal upkeep, have gutter cleaning tools like extendable scoops and heavy-duty gloves. A pair of binoculars is useful for conducting safe, ground-level visual inspections of the roof for potential damage.
Water heater maintenance requires a garden hose to perform the recommended quarterly sediment flush, which prevents corrosion and maintains heating efficiency.
A moisture meter helps identify hidden dampness in walls or floors. Strategically place water leak detectors under sinks, behind toilets, and near the water heater to provide early warnings.
Maintain the building envelope with exterior-grade caulk for windows and doors, roof sealant for minor repairs, and concrete crack filler for addressing issues found during bi-annual foundation inspections.
Use a dedicated logbook or digital app to formally record all inspection dates, filter changes, battery replacements, and repairs. This creates a verifiable maintenance history for accountability and planning.
When to Strip and Resurface
A full strip and resurface is needed when the reflective surface is compromised beyond spot repairs. This is determined by the condition of the underlying substrate and the depth of damage. The process involves completely removing the old mirror tiles and adhesive, then applying a new, uniform reflective layer to restore optical integrity.

Assessing the Condition for a Full Overhaul
The substrate (the ball’s core) must be in fair or better condition, with no major structural flaws like deep cracks or warping.
The existing reflective layer is extensively damaged, with widespread delamination, missing tiles, or deep scratches that compromise over 30% of the surface area.
Prior repairs or adhesive layers have built up, creating an uneven base that prevents a smooth, new application.
The goal is to prevent moisture or contaminants from infiltrating and damaging the core structure, which requires a complete seal with a new surface.
The Resurfacing Process and Material Specifications
Completely remove all old mirror tiles and adhesive residue to expose the clean, sound substrate, analogous to milling out old rumble strips.
The new mirror tile or film layer must have a thickness that exceeds the depth of any prior imperfections to ensure a seamless, durable finish.
Apply a new adhesive or bonding agent designed for longevity; treatments like specialized sealants can extend the new surface’s life by several years.
Precision alignment during the new tile application is critical, ensuring joints are tight and the overall surface is perfectly spherical for uniform reflection.
Final Thoughts
Keeping a large mirror ball in peak condition is a blend of science and precision. Dust isn’t just dirt; it’s a layer that actively steals light and dulls the sparkle. Cleaning isn’t just wiping; it’s a controlled chemical process to lift grime without harming delicate surfaces. Repairing a missing tile isn’t just gluing; it’s a micro-facade restoration that must preserve the ball’s balance and spherical profile to maintain its signature light reflection.
For rental houses and production managers, this systematic approach is an investment. A disciplined cleaning routine, a well-stocked maintenance kit, and the knowledge to perform professional-grade repairs and resurfacing extend the asset’s life and performance. It ensures that every time the mirror ball spins, it delivers the maximum visual impact it was engineered for, protecting your investment and your show’s quality.
Frequently Asked Questions
How do I clean a disco ball?
Unplug the ball from power first. Clean the external surface every 20 days using only a soft, dry cloth to remove dust and debris. Never use water, alcohol, ammonia-based cleaners, solvents, or any abrasive materials, as these can damage the mirror tiles and backing.
How do I fix missing mirror tiles on a disco ball?
For small repairs, you can epoxy-bond replacement glass mirror tiles, typically 1 cm (10 mm) square, onto the ball’s core. Match the original tile size and spacing. If more than 10-20% of tiles in an area are missing or the core is exposed or warped, the structural integrity is compromised, and replacing the entire ball is the professional recommendation.
Can I use alcohol to clean mirror tiles?
Yes, high-purity alcohol like 96% ethanol is a standard agent in optical cleaning protocols and can be used effectively on glass mirror tiles without leaving residue or causing damage. It is suitable for removing fingerprints and light oils. Always test on a small, inconspicuous area first, especially on painted surfaces.
What’s the best way to remove adhesive residue from glass or metal?
Apply a citrus-based adhesive remover to the residue, allow it to penetrate for 3-5 minutes, then gently scrape with a plastic tool. Repeat if necessary before rinsing with water and drying. For stronger residues on mirror ball surfaces, a combination of low heat (pulling at a low angle) and a compatible chemical remover is often effective.
How can I prevent mirrors from turning black or oxidizing?
Use high-quality mirrors with protective dielectric overcoats (like SiO2) and copper-free manufacturing. Ensure edges are sealed with neutral-cure silicone or polyurethane during installation, maintain proper ventilation, and avoid prolonged exposure to moisture. Anti-oxidation mirrors can resist tarnishing for over 3 times longer than standard mirrors.
Is there a repair kit available for disco balls?
Yes, commercial repair kits are available. They typically include specialized adhesive, spare mirror tiles (common sizes are 5x5mm or 10x10mm), a tool for removing broken pieces, and instructions. These kits allow for the replacement of individual damaged tiles, extending the life of your mirror ball.