

A static disco ball is a powerful visual asset, but without the right lighting design, it’s just a mirrored sphere. For event professionals, the challenge isn’t just illuminating it—it’s engineering the precise reflections that transform a space. This article cuts through the guesswork to provide the actionable, technical knowledge you need to design with intent and control.

We’ll break down the core principles of event lighting design for static disco balls, from selecting the correct fixture based on beam angle (like a 5°–18° spot for sharp highlights) to mastering color mixing with RGBW fixtures for vibrant, saturated effects. You’ll learn how to map reflections to avoid glare, integrate with natural light, and apply practical specs—such as using fixtures with a min:avg illuminance ratio greater than 0.7 for uniform coverage—to ensure your design is both stunning and technically sound.
Industry Manufacturers List
Quick Comparison: Top Picks
| Manufacturer | Location | Core Strength | Verdict |
|---|---|---|---|
| Subject-to-Mirror Distance vs. Mirror-to-Light Distance Ratio | Industry Wide | Target ratio range: subject‑to‑mirror : mirror‑to‑key‑light ≈ 1:1 to 1.5:1 for comfortable reflected image brightness and modeling | Provides practical guidance for clear, undistorted reflections without hotspotting, ideal for event staging and training exhibits. |
| Viewer-to-Reflective-Surface Distance vs. Background Luminance Ratio | Global Standard | Critical visibility limit: background luminance ≤ 4:1 relative to face luminance to avoid silhouetting | Essential for security and visibility, prevents faces from being lost as silhouettes against bright backdrops. |
| Reflected Task Luminance Ratio for Maximum Clarity Without Veiling Glare | Global Standard | Max recommended luminance ratio for reflections on critical visual tasks: ≤ 4:1 | Key IES guidance to avoid veiling glare and loss of detail on glossy boards and panels. |
| General Surface Luminance Ratios Around Reflective Elements | Global Standard | Typical recommended ratios: surfaces within ~3:1; ceilings/brighter elements not more than ~8:1–10:1 versus darkest large areas | Foundational lighting design guidelines for visual comfort and clarity in spaces with mixed finishes. |
| Vertical-to-Horizontal Illuminance Ratio for Facial Modeling in Reflections | Global Standard | Optimal vertical‑to‑horizontal illuminance ratio for comfortable facial modeling: 0.3–0.6 | Critical for achieving clear, three-dimensional facial appearance in both direct and reflected views. |
| Illuminance Uniformity Ratios to Avoid Patchy Reflections | Industry Wide | Typical demanding‑task uniformity target: Emin/Eavg ≈ 0.6–0.7; contrast metric Emin/Emax used to highlight glare risk | Prevents high-contrast, distracting reflections on glossy surfaces in large-area applications. |
Subject-to-Mirror Distance vs. Mirror-to-Light Distance Ratio

This principle addresses a common challenge in setups involving mirrors and lighting. The goal is to manage the brightness and contrast of the reflected image to prevent visual issues like hotspotting or an overly dim reflection, ensuring the subject remains clearly visible and well-modeled.
The core recommendation is to maintain a specific distance ratio. By keeping the subject-to-mirror distance roughly equal to or slightly greater than the mirror-to-key-light distance, you create a balanced visual environment. This ratio, typically between 1:1 and 1.5:1, is a reliable starting point for consistent results across various applications.
At a Glance:
- 📍 Location: Industry Wide
- 🏭 Core Strength: Target ratio range: subject‑to‑mirror : mirror‑to‑key‑light ≈ 1:1 to 1.5:1 for comfortable reflected image brightness and modeling
- 🌍 Key Markets: Event staging, mirror‑wall demos, safety/traffic training exhibits with observer-facing mirrors
Why We Picked Them:
| ✅ The Wins | ⚠️ Trade-offs |
|---|---|
|
|
Viewer-to-Reflective-Surface Distance vs. Background Luminance Ratio

This standard addresses a critical visibility challenge in security and design. When identifying faces against a reflective surface like glazing or glass railings, a bright background can obscure details. If the background behind a person is more than about four times brighter than the face, the individual appears only as a dark silhouette, making recognition impossible.
The guideline establishes a clear, measurable limit to prevent this. By mandating that background luminance be kept within a 4:1 ratio relative to the lit face, it ensures that reflected figures remain distinct and identifiable against their backdrop. This principle is foundational for creating safe and functional spaces with reflective materials.
At a Glance:
- 📍 Location: Global Standard
- 🏭 Core Strength: Critical visibility limit: background luminance ≤ 4:1 relative to face luminance to avoid silhouetting
- 🌍 Key Markets: Security lighting, crowd‑recognition zones, traffic/education simulations involving reflective façades
Why We Picked Them:
| ✅ The Wins | ⚠️ Trade-offs |
|---|---|
|
|
Reflected Task Luminance Ratio for Maximum Clarity Without Veiling Glare

This standard provides essential guidance for visual tasks, focusing on the luminance ratio between a task and its immediate surroundings. Its core principle is to keep specular reflections on critical surfaces at or below a 4:1 ratio relative to nearby non-reflective areas. This specific limit is designed to prevent veiling glare, which can obscure details and reduce legibility, ensuring that information remains clear and accessible under typical lighting conditions.
The guidance is applied by carefully arranging light sources, such as projectors or key lights, and considering viewer positions. For instance, when setting up a glossy presentation board or a reflective control panel, the placement of lights and the distance of the audience must be calibrated so that any bright reflections do not exceed about four times the luminance of the adjacent matte surfaces. This practical application helps maintain optimal visibility without requiring specialized equipment for end-users.
At a Glance:
- 📍 Location: Global Standard
- 🏭 Core Strength: Max recommended luminance ratio for reflections on critical visual tasks: ≤ 4:1
- 🌍 Key Markets: Educational boards, traffic-simulation control panels, glossy signage within event spaces
Why We Picked Them:
| ✅ The Wins | ⚠️ Trade-offs |
|---|---|
|
|
General Surface Luminance Ratios Around Reflective Elements

These guidelines provide a framework for managing light and contrast in interior environments. They focus on maintaining visual comfort by controlling the luminance ratios between different surfaces, which is especially important in spaces where reflections are a key part of the experience.
The core principle is to keep most surfaces within a 3:1 luminance ratio. This helps avoid distracting contrasts that can strain the eyes and degrade the perceived clarity of reflections, ensuring that glossy or mirrored elements function as intended without causing visual discomfort.
At a Glance:
- 📍 Location: Global Standard
- 🏭 Core Strength: Typical recommended ratios: surfaces within ~3:1; ceilings/brighter elements not more than ~8:1–10:1 versus darkest large areas
- 🌍 Key Markets: General event ambience, museum‑style educational exhibits, traffic classrooms with mixed matte and glossy surfaces
Why We Picked Them:
| ✅ The Wins | ⚠️ Trade-offs |
|---|---|
|
|
Vertical-to-Horizontal Illuminance Ratio for Facial Modeling in Reflections

This standard addresses a specific challenge in lighting design: how to make a person’s face appear clear and three-dimensional when seen indirectly, such as in a mirror or through glass. The recommended vertical-to-horizontal illuminance ratio provides a measurable target for designers to create environments where reflected figures look lifelike rather than flat.
The guideline is not tied to a physical factory but represents a production capacity for optimal visual quality. It defines the precise lighting conditions—specifically the balance of light falling on vertical surfaces (like a face) versus horizontal surfaces—needed to generate comfortable and realistic facial modeling in reflective scenarios.
At a Glance:
- 📍 Location: Global Standard
- 🏭 Core Strength: Optimal vertical‑to‑horizontal illuminance ratio for comfortable facial modeling: 0.3–0.6
- 🌍 Key Markets: Stage‑mirror effects, training rooms with front‑glass or mirror walls, speaker/presenter reflections in educational events
Why We Picked Them:
| ✅ The Wins | ⚠️ Trade-offs |
|---|---|
|
|
Illuminance Uniformity Ratios to Avoid Patchy Reflections

This framework addresses the challenge of uneven lighting, which can cause patchy, high-contrast reflections on glossy surfaces. It uses specific metrics to quantify light distribution, ensuring visual comfort and task performance in demanding environments.
The standard defines target ratios for uniformity, such as Emin/Eavg and Emin/Emax. These metrics set a benchmark for lighting design, requiring a balanced spread of light to minimize stark contrasts that lead to visual distraction and glare.
At a Glance:
- 📍 Location: Industry Wide
- 🏭 Core Strength: Typical demanding‑task uniformity target: Emin/Eavg ≈ 0.6–0.7; contrast metric Emin/Emax used to highlight glare risk
- 🌍 Key Markets: Roadway-inspired demos, large educational halls with reflective finishes, parking/approach zones for event venues
Why We Picked Them:
| ✅ The Wins | ⚠️ Trade-offs |
|---|---|
|
|
The Relationship Between Light and Mirror
The relationship between light and mirrors in event lighting design involves using mirrors to reflect, redirect, and amplify light beams. This manipulation enhances coverage, depth, and dynamic effects on stage, going beyond basic illumination to create specific moods and focus.
How Mirrors Manipulate Light for Event Design
Mirrors are used to reflect, redirect, and amplify light beams, enhancing coverage, depth, and dynamic effects on stage. This manipulation is fundamental for achieving visibility, mood, and focus, going beyond basic illumination to create an experience. Key applications include shaping beams in moving head lights, creating aerial effects, and projecting patterns through gobos or prisms.
Technical Principles for Layering and Control
Mirrors enable layered lighting by bouncing light into specific zones, adding 3D dimension crucial for events with deep sightlines or broadcasts. Narrow beams from mirrored optics are suited for long throws (50–400m), while zoom ranges (10–60°) allow dynamic reshaping without moving fixtures. For quality, high CRI mirrors (80–95) preserve accurate skin and costume tones, and uniform illuminance requires a min:avg ratio greater than 0.7.
Practical Integration and Fixture Applications
Different fixture types leverage mirrors for specific roles: LED washes for even color blends, ellipsoidal spots for sharp focus, and LED effects for textured beams via prisms. Safety and installation require mirrors to align with rigging, use IP65-rated fixtures outdoors, and manage glare (GR <35 indoor/<40 outdoor). The relationship is purpose-driven; start with placement goals, then use technical metrics like lux studies and IES guidelines for precision.
Pinspots: Creating the “Dot” Effect
Pinspots create a “dot” effect using narrow-beam LED lights to produce sharp, focused spots of illumination on specific objects like centerpieces or stage elements, simulating the classic halogen pinspot look with modern efficiency.
What a Pinspot Does and Why It’s Essential

Pinspots use narrow-beam LED lights to create sharp, focused spots of light, known as the ‘dot’ effect. This technique highlights specific objects like centerpieces or stage elements without washing the surrounding area in broad light.
It simulates the classic look of traditional halogen pin spots but uses modern, energy-efficient LED technology. The effect is fundamental for adding visual depth, drawing attention, and creating dramatic focal points in event spaces.
Technical Specs and How to Control the Beam
Key technical specs include ultra-narrow beam angles, typically between 3° and 12°, which concentrate light into a precise dot. Models like the ADJ Pinspot LED II use interchangeable lenses (e.g., 3° and 12°) to adjust the beam’s tightness and the resulting dot size on a surface.
High-intensity RGBW quad-LEDs allow for dynamic color mixing and pure white light, enabling vibrant or neutral dots to match any theme. Control options range from manual operation to DMX and IR remote, providing precise dimming and positioning without flicker, which is crucial for video.
Practical Applications for Event Professionals
For decorators and novices, pinspots are mounted on trusses or stands to spotlight tables, creating an intimate atmosphere at events like weddings. Battery-powered models, such as the Rasha LED Pinspot, offer wireless setups for flexible placement without access to power outlets.
For veteran lighting designers, integrating pinspots into a DMX-controlled system allows for synchronized light shows and precise mid-air beam effects. Their low heat output, energy efficiency, and portability make them suitable for diverse venues, from art galleries and stages to DJ performances.
Source Commercial-Grade Mirror Balls, Not Party Favors
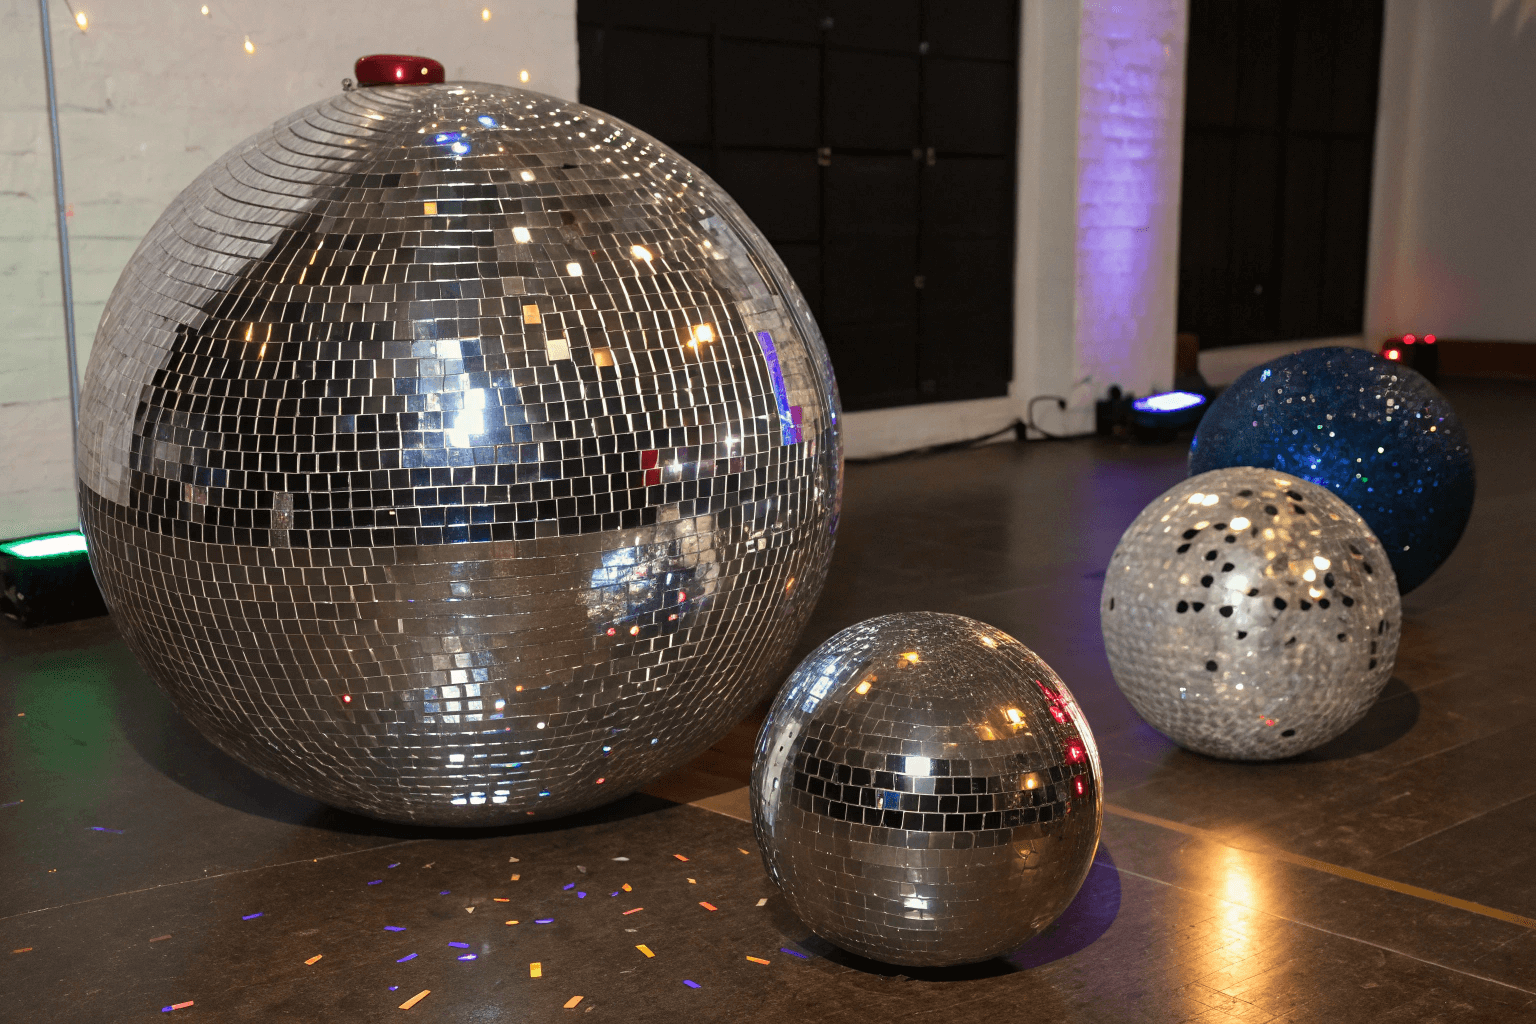
Beam Angles for Different Sphere Sizes
The right beam angle is essential for creating the intended visual effect on a mirrored sphere, from sharp, glittering highlights to soft, ambient washes.
Understanding Beam Angle Categories
Beam angles are categorized by their spread, from tight spots to wide floods, each serving a distinct purpose in lighting design.
The primary categories are Spot (5°–18°), Narrow (18°–30°), Narrow Flood (30°–60°), Flood (60°–90°), Wide Flood (90°–120°), and Elliptical beams.
Choosing the right category is the first step in matching light to the scale and purpose of a mirrored sphere or architectural feature.
Matching Angles to Sphere Size and Effect
For small to medium spheres (e.g., 20-50cm), a Spot (5°–18°) or Narrow (18°–30°) beam creates a defined, intense highlight, perfect for creating a sharp, glittering focal point.
Medium to large spheres (e.g., 80-150cm) pair well with Narrow Flood (30°–60°) angles, which provide a balanced mix of concentrated light and broader coverage to illuminate more of the surface.
Large architectural spheres or installations benefit from Flood (60°–90°) or Wide Flood (90°–120°) beams for overall ambient illumination, ensuring the entire form is evenly lit without harsh shadows.
Elliptical beams (e.g., 5°+170°) are specialized tools, ideal for washing light under a sphere’s mounting or creating dramatic, sweeping accents across its surface.
Practical Application for Event and Architectural Lighting
In event spaces, use tight Spot beams to make individual mirror balls ‘pop’ as distinct features within a larger design, while Wide Flood beams can softly illuminate clusters of spheres from below.
For permanent architectural installations, such as a lobby with a large mirrored sculpture, a combination of Narrow Flood for definition and Flood for fill light creates depth and visual interest.
The beam angle directly influences the clarity and intensity of reflections; a narrower beam on a small sphere yields sharper, more dynamic light movement, while a wider beam on a large sphere produces a softer, more diffuse glow.
Always consider the fixture’s distance from the sphere—the beam angle determines the coverage area at that specific throw distance, which is critical for achieving the intended reflection pattern.
Working with Natural Light (Windows & Sunbeams)
Effective natural light management involves mapping its movement, controlling it with layered window treatments, and integrating it with artificial fixtures to create a stable, comfortable environment for events, from educational conferences to social gatherings.

Assessing and Planning for Natural Light
Begin by mapping how daylight enters and moves through the venue over the event schedule, noting the size and orientation of windows, skylights, and glass doors.
Identify periods when direct sunbeams will cross key areas like the stage, seating, or projection surfaces to anticipate potential glare and visibility issues.
For educational events, document measured light levels (lux) at different times of day to predict when natural light alone is sufficient and when supplemental fixtures are needed.

Controlling and Balancing Light Sources
Implement layered control systems for windows, including sheer shades for glare reduction and full blackout drapes for projection-critical moments.
Treat natural and artificial light as a single integrated system, using controllable LED fixtures to fill shadows and maintain consistent focus as daylight changes.
Use daylight-responsive control systems where possible to automatically adjust artificial lighting, stabilizing total illuminance and saving energy.

Creative and Practical Applications
Use sunlight as a design element to create welcoming networking zones and schedule breaks during golden hour for flattering natural tones.
When windows must be blacked out, replicate a natural-light aesthetic indoors by combining diffused, high-CRI white light with warm accent sources.
Plan the event schedule around the sun’s path, placing projection-heavy sessions when direct sun is not an issue to avoid technical conflicts.
Color Mixing: Using RGB Washes on Silver Balls
Color mixing with RGB washes on silver balls involves applying red, green, and blue LED light to reflective spherical surfaces, creating vibrant secondary colors like yellow, magenta, and cyan through additive mixing. The silver finish amplifies brightness and saturation, making colors dynamic and ideal for event decor.
The Principles of Additive Color on Reflective Surfaces
Silver balls reflect and scatter light specularly, which amplifies the vibrancy and saturation of colors created through additive RGB mixing.
Additive mixing combines red, green, and blue light channels; full intensity of all three produces white light, but on a silver surface, this white appears with high luminosity.
The metallic finish creates specular highlights and diffuse scattering, making colors appear more dynamic and ‘pop,’ especially when the balls are in motion.
Practical RGB Mixes and Their Effects
A full red and green mix creates a warm yellow or golden reflection, ideal for creating festive or uplighting atmospheres.
Combining full red and blue produces a vibrant magenta or purple sheen, suited for dramatic nightlife or concert scenes.
Mixing full green and blue yields a cool cyan or turquoise glow, effective for modern or tech-themed event decor.
For a clean, bright white wash, using all three RGB channels at full intensity is standard, but incorporating a dedicated white LED channel (RGBW) improves efficiency and color temperature control.
Advanced Techniques and Best Practices for Designers
Use wash fixtures with optical mixing chambers to ensure smooth color blends and avoid harsh hotspots on the spherical surface.
For consistent results across multiple silver balls, select RGBW fixtures with tight LED binning and calibrate them regularly to prevent hue shifts.
Integrate DMX or wireless control for dynamic effects, using calibrated color palettes and fades to create kinetic color shifts during events.
When lighting for events where skin tones or fabrics are important, target specific Correlated Color Temperatures (CCT) like 3200K (warm) or 5600K (daylight) using the white channel in RGBW fixtures.
Mapping Reflections in Event Spaces
Reflections in event lighting are the result of light bouncing off surfaces like floors, walls, and glass. In traffic and education events, these reflections can either enhance brightness and depth or create distracting glare on screens and presenters. Effective design involves mapping these reflections as part of the spatial planning process.
Understanding Reflections in Event Spaces
Reflections occur when light from fixtures hits surfaces like floors, walls, and glass, then bounces into the audience’s view or cameras. In traffic and education events, reflections can either enhance brightness and depth or create distracting glare on screens and presenters. Effective design treats reflections as part of spatial mapping, planning for both the first hit on a target and the controlled second hit from a bounce.
Surface Reflectance Mapping
This process involves cataloging each major surface by its approximate reflectance percentage and finish type, such as matte, satin, or gloss. Light-colored matte walls support even, educational lighting, while glossy floors and glass partitions create specular reflections that must be managed. Mapping surfaces prevents veiling reflections that reduce legibility on critical teaching tools like projection screens, whiteboards, and traffic sign mock-ups.
Beam Geometry and Reflection Paths
This links a fixture’s position, beam angle, and tilt to potential first-hit and secondary reflection points in the room. Designers estimate or simulate how a key light aimed at a lectern might bounce off a glossy surface into the audience, then adjust aiming to redirect the path. For traffic and education environments, this is critical when lighting vertical teaching surfaces to ensure visibility without reflective glare obscuring instructional content.
Controlling Glare and Veiling Reflections
Glare and veiling reflections reduce contrast on critical visual targets like screens, whiteboards, and printed teaching materials. In event spaces, this often appears as bright streaks across projection screens or washed-out diagrams, especially from overhead key light. Mitigation involves choosing matte finishes, shifting fixtures off-axis, using softer beam edges, and planning vertical illuminance to preserve contrast.
Using Reflections to Enhance Perceived Space and Mood
Controlled reflections can expand the perceived size of a room, emphasize architectural features, and add depth to an event environment. For educational events, wall washing and uplighting on light-colored surfaces create a bright, open feel that supports alertness and safe circulation. Subtle reflections on textured panels or model intersections can highlight edges and forms, improving legibility and spatial comprehension without creating glare.
Tools for Predicting and Mapping Reflections
Prediction tools range from on-site tests with portable fixtures to full 3D previsualization using CAD and photometric software. Designers import venue geometry, assign reflectance values, and analyze luminance from key audience and camera positions to refine the light plot before load-in. For smaller events, simpler methods like shining a test beam at teaching surfaces during a site visit and documenting safe angles form an effective workflow.
Practical Tactics for Novices and Veterans
Novices can map reflections by walking the room with a simple LED fixture, observing glare from audience positions, and adjusting planned fixture locations. Veterans formalize the process using light plots, focus charts, photometric software, and camera tests to verify no hazardous reflections occur in shots. In traffic and education contexts, both groups must prioritize legibility and safety, ensuring signage, screens, and presenters remain clearly visible from all sightlines.
Frequently Asked Questions
What are the best lights for a disco ball?
The best lights create sharp, focused reflections. Pin spotlights with narrow 5°–15° beams are ideal for high-contrast patterns. LED models are recommended for efficiency and durability. Moving head lights add dynamic motion and textured projections, perfect for large venues. Laser lights project vibrant patterns for enhanced effects, and UV blacklights make reflective sequins glow for themed parties.
How should I place lights for a disco ball?
Aim tight, focused spotlights from the side or slightly below the ball, not from directly underneath. For a ball centered over a dance floor, use two spotlights on opposite sides, each covering half the ball for full-room coverage. If the ball is near a wall, one spotlight from the opposite side is usually sufficient. Position lights so their beam is wider than the ball’s diameter, placed at a 30–45° angle to the ball for a wide, dynamic spread of reflections.
Should I use LED or halogen pinspots for mirror balls?
LED pinspots are generally the better choice. They use about 80–90% less power, run much cooler, last up to 50,000 hours, and offer tight beam control with crisp edges. Halogen pinspots produce a warmer, more natural-looking beam that some prefer for a classic look, but they are less efficient, hotter, and have a shorter lifespan. For most events, especially those requiring multiple fixtures or precise control, LED pinspots provide greater safety, flexibility, and long-term cost savings.
How many lights do I need for one disco ball?
Professional setups typically use 2 to 4 focused pinspot or narrow-beam fixtures for a single standard mirror ball. This provides strong, even reflections and 360° coverage. Using only one light creates a one-sided effect, while more than four can wash out the distinct beams. For small rooms, two lights often work well; larger venues or feature installations commonly use three or four lights per ball.
How can I create a galaxy effect with disco balls?
Pair a standard disco ball with a dedicated galaxy projector. These devices project starry night skies, nebula patterns, and aurora effects onto ceilings and walls. For the best results, mount the projector 8-12 feet high and aim it at a dark surface. Using a fog machine can make the light beams more visible. While standard disco balls scatter light, combining them with these projectors or RGB LED pinspots can mimic a cosmic, twinkling starfield effect.
What lighting works best for weddings with disco balls?
For weddings, use 2-4 pinspot lights or narrow-beam LED fixtures to create sharp, sparkling reflections across the dance floor. Position the lights at 30°-45° angles below the ball’s midline. Hang the disco ball 7-8 feet high for even coverage. Combine this with LED pars for ambient room color, using warm tones for receptions. Avoid overhead lighting, which can create flat effects, and test the setup in rehearsal to adjust for ambient light and ensure the desired romantic or vibrant atmosphere.
Final Thoughts
Lighting a static disco ball is more than just pointing a light at a mirrored surface. It’s a deliberate design choice that combines technical knowledge with creative vision. The right beam angle, fixture type, and placement work together to transform a simple sphere into a dynamic centerpiece that can define the mood of an entire event.
Whether you’re aiming for sharp, glittering pinpoints of light or a soft, ambient glow, the principles remain the same: start with your desired visual effect, then apply the appropriate tools and techniques to achieve it. From intimate weddings to large-scale architectural installations, a well-lit mirror ball adds a layer of magic and movement that static lighting simply cannot match.